Resource
https://www.mongodb.com/docs/v2.4/core/master-slave/
IMPORTANT
If stuck, first check netstat -tulnp and mongod -f config.conf to see if it is running or not.
Make sure both are on same VPC with security groups configured. Use mongod -f config_file.conf to start with forked processes to run them.
Here is SECONDARY node config file
slave.conf
storage:
  dbPath: /usr/local/var/mongodb/slave
net:
  bindIp: 0.0.0.0
  port: 27017
security:
  authorization: enabled
  keyFile: /usr/local/var/mongodb/pki/replicaset-keyfile
systemLog:
  destination: file
  path: /usr/local/var/log/mongodb/slave/mongod.log
  logAppend: true
processManagement:
  fork: true
replication:
  replSetName: master-slave
BindIp means it is listening to IP addresses mentioned. Here 0.0.0.0 means all of them, 127.0.0.1 is same as localhost only. It must listen at 0.0.0.0 to listen to all connections as slave.
TODO - Multiple IPs here in bindIP did not work properly
The directories /usr/local/var/mongodb/slave, /usr/local/var/mongodb/pki and /usr/local/var/log/mongodb/slave have to be created before hand.
NOTE - The names of replSetName must be same as well.
In order to get authentication, we use OpenSSL to generate keyfile using base64 encoding which must be in both EC2 for communication.
Create Keyfile in all machines
sudo mkdir -p /usr/local/var/mongodb/pki/
openssl rand -base64 741 > /usr/local/var/mongodb/pki/replicaset-keyfile
chmod 400 /usr/local/var/mongodb/pki/replicaset-keyfile
Master.conf
# mongod.conf

# for documentation of all options, see:
#   http://docs.mongodb.org/manual/reference/configuration-options/

# where to write logging data.
systemLog:
  destination: file
  logAppend: true
  path: /var/log/mongodb/masternode/mongod.log

# Where and how to store data.
storage:
  dbPath: /var/lib/mongo/masterdb
  journal:
    enabled: true
#  engine:
#  wiredTiger:

# how the process runs
processManagement:
  fork: true
  timeZoneInfo: /usr/share/zoneinfo

# network interfaces
net:
  port: 27017
  bindIp: 10.0.4.65 # Enter 0.0.0.0,:: to bind to all IPv4 and IPv6 addresses or, alternatively, use the net.bindIpAll setting.

#security:
security:
  authorization: enabled
  keyFile: /usr/local/var/mongodb/pki/replicaset-keyfile

#replication:
replication:
  replSetName: master-slave
Here also we create the directories /var/log/mongodb/masternode/ and /var/lib/mongo/masterdb with keyfile path. Here we also set the BindIp to 10.0.4.65 which is the machine’s IP on port 27017.
Note - Different machines can run mongo instances on same 27017 port.
Start Master
Run mongod -f mongod.conf to run child process.
Check netstat -tulnp to find mongod as child process running.
Then run mongosh --port 27017 to create user and roles.
There run command -
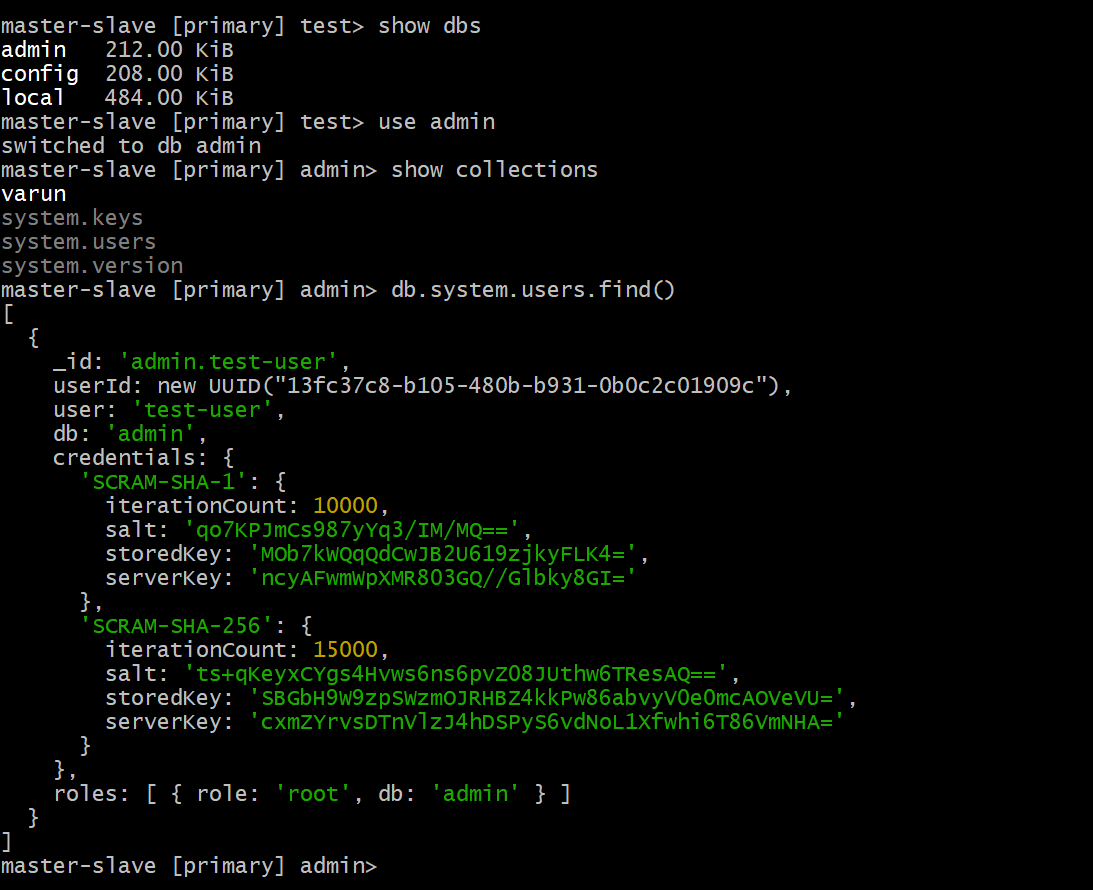
It initiates replica and we change database to admin and then create user in it with role assigned as root of admin database. This is to give read/write permissions to only user created.
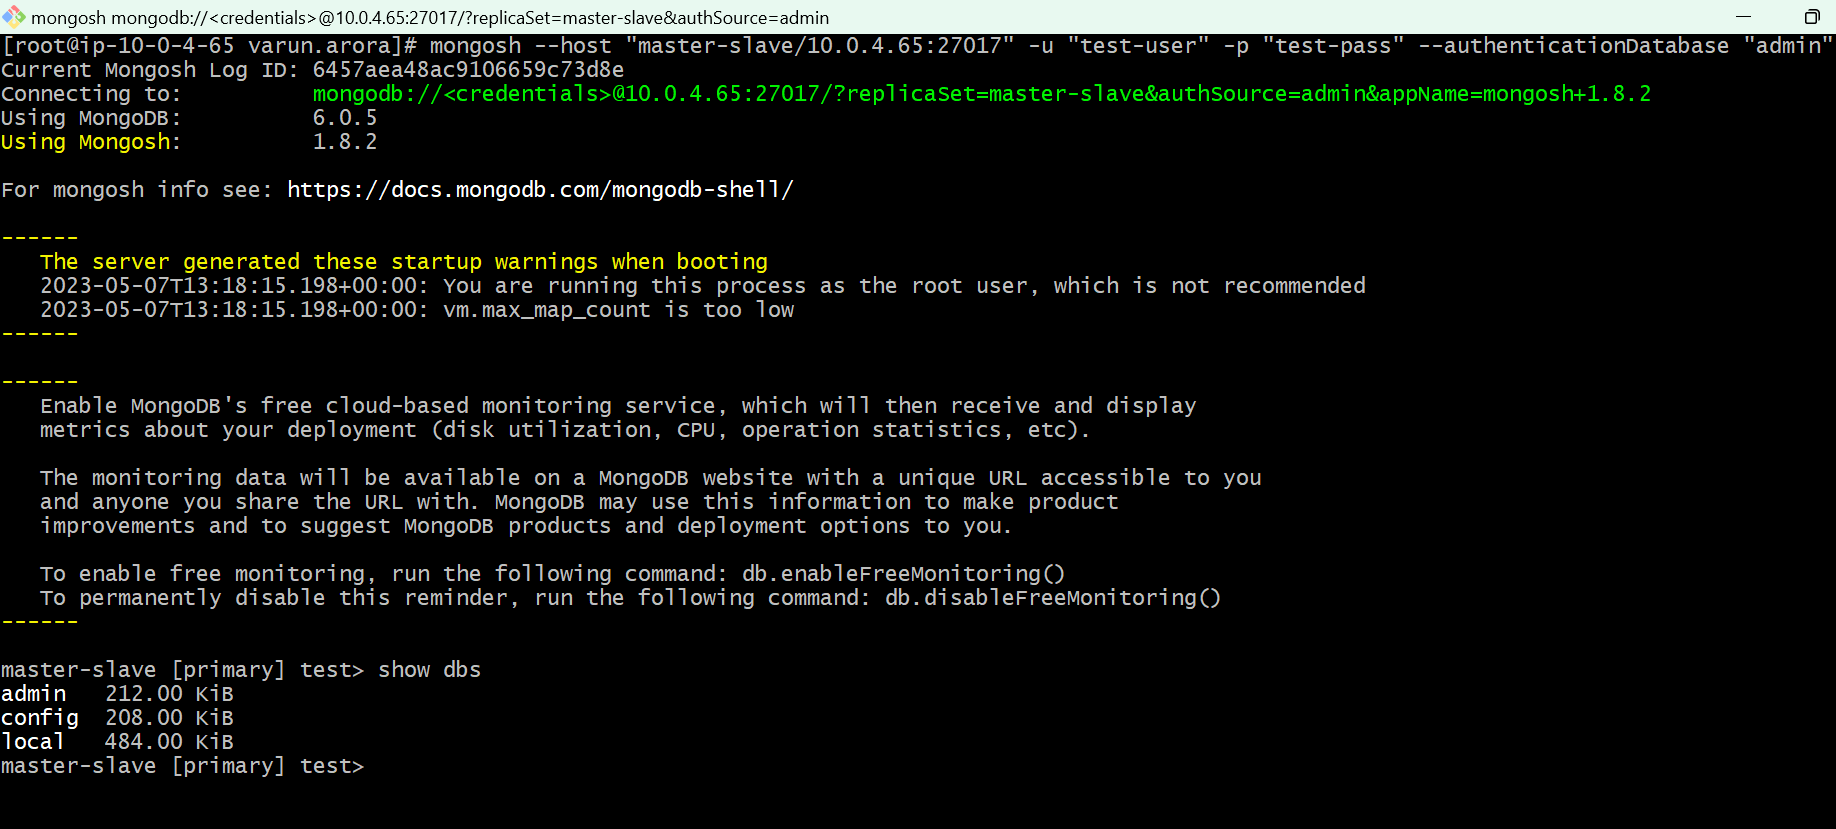
Now disconnect by ctrl+c and login to replica by credentials u entered as -
mongosh --host "master-slave/10.0.4.65:27017" -u "test-user" -p "test-pass" --authenticationDatabase "admin"
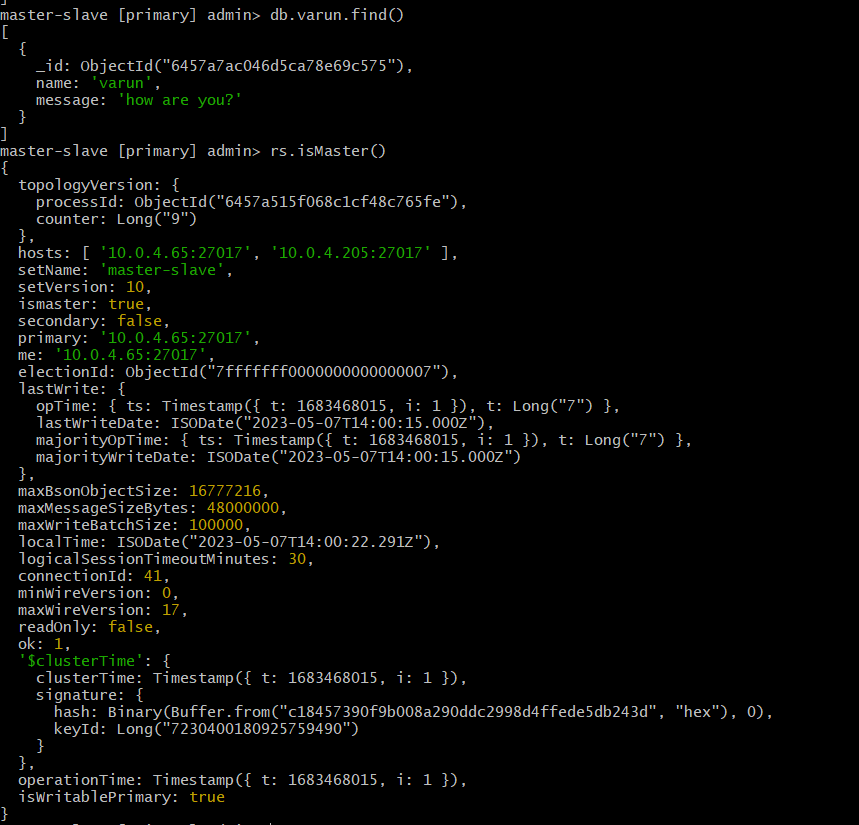
Run rs.isMaster() to check is current node is master.
There we add user rs.add('10.0.4.205:27017') as SECONDARY while previous was primary.
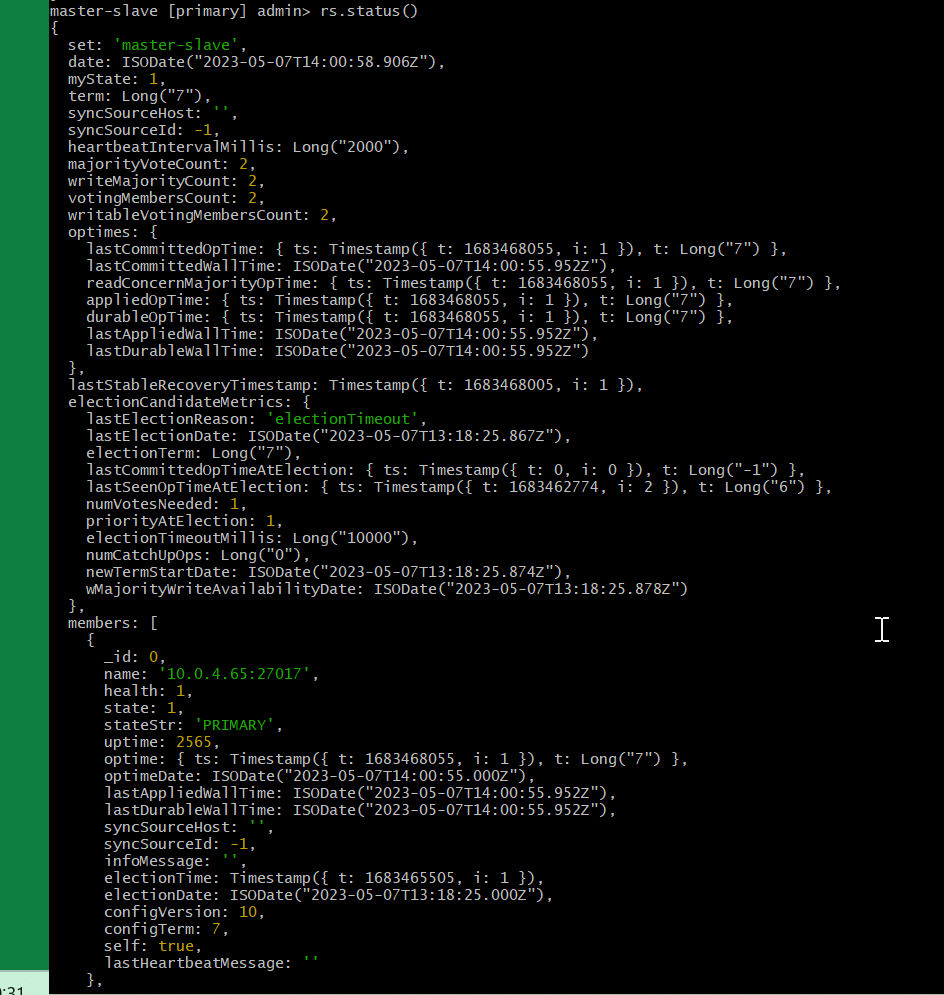
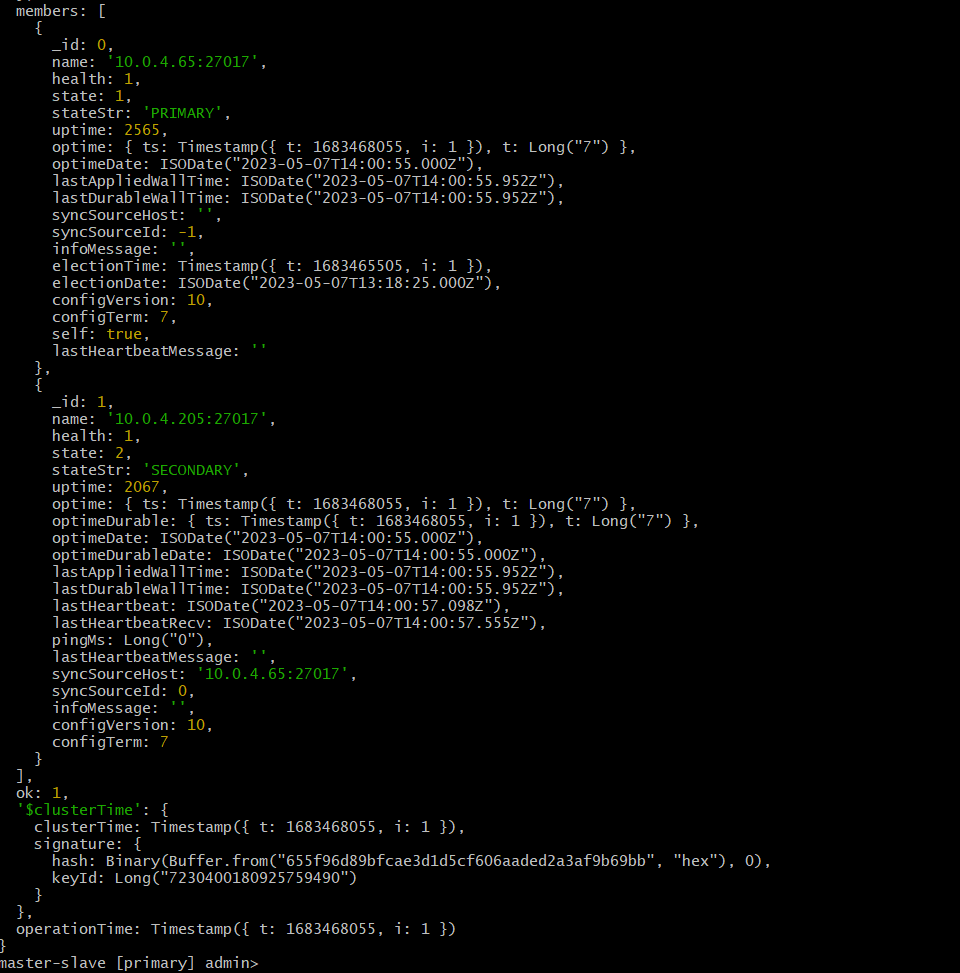
For checking the connection run rs.status()
Note - rs.initiate() cannot be done again but we can change hostnames and mroe things(https://www.mongodb.com/docs/manual/tutorial/change-hostnames-in-a-replica-set/)
Secondary SS

Primary SS
rs.status()
Adding Read user for Secondary
First authenticate inside the master and then write the command inside db.createUser({user: 'user1', pwd: 'pass', roles: [{ role: 'read', db: 'myDB' }] }) after making myDB.
Then make a collection inside and insert data to later check.
Do db.myCollection.find() to see the data inside.
Authenticate in SECONDARY node
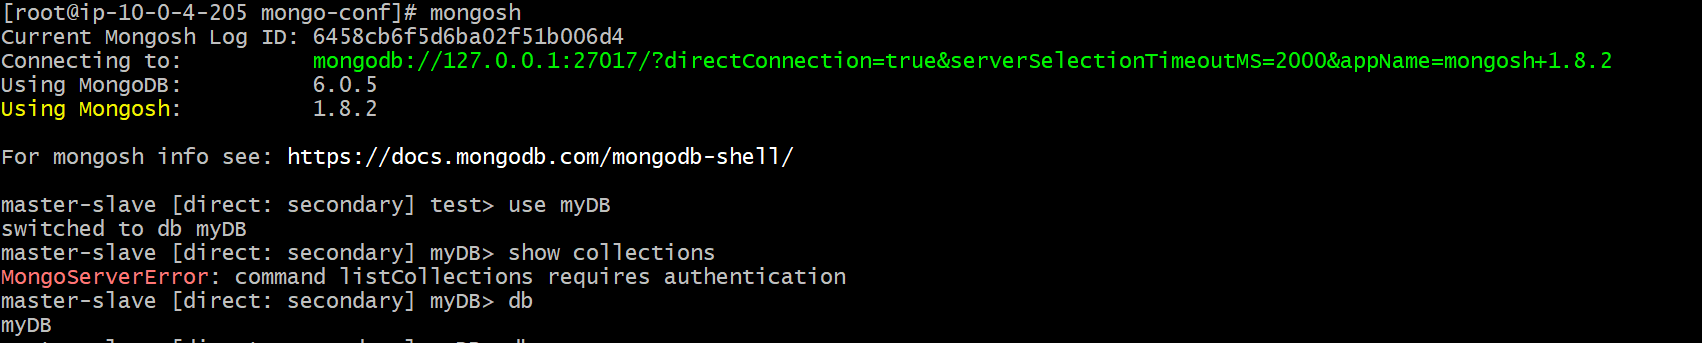
Inside secondary machine, type mongosh which starts at port 27017.
Do use myDB to switch to it for use.
On show collections you might get authentication error.
Authenticate user for read permissions via command db.auth({user: "user1", pwd: "pass"})
Now the user must be authenticated for READ permissions and test this by myDB.myCollection.find()

It gives error as read preference is by default primaryPreferred
Use command rs.secondaryOK() to give read permissions to secondary nodes as well.

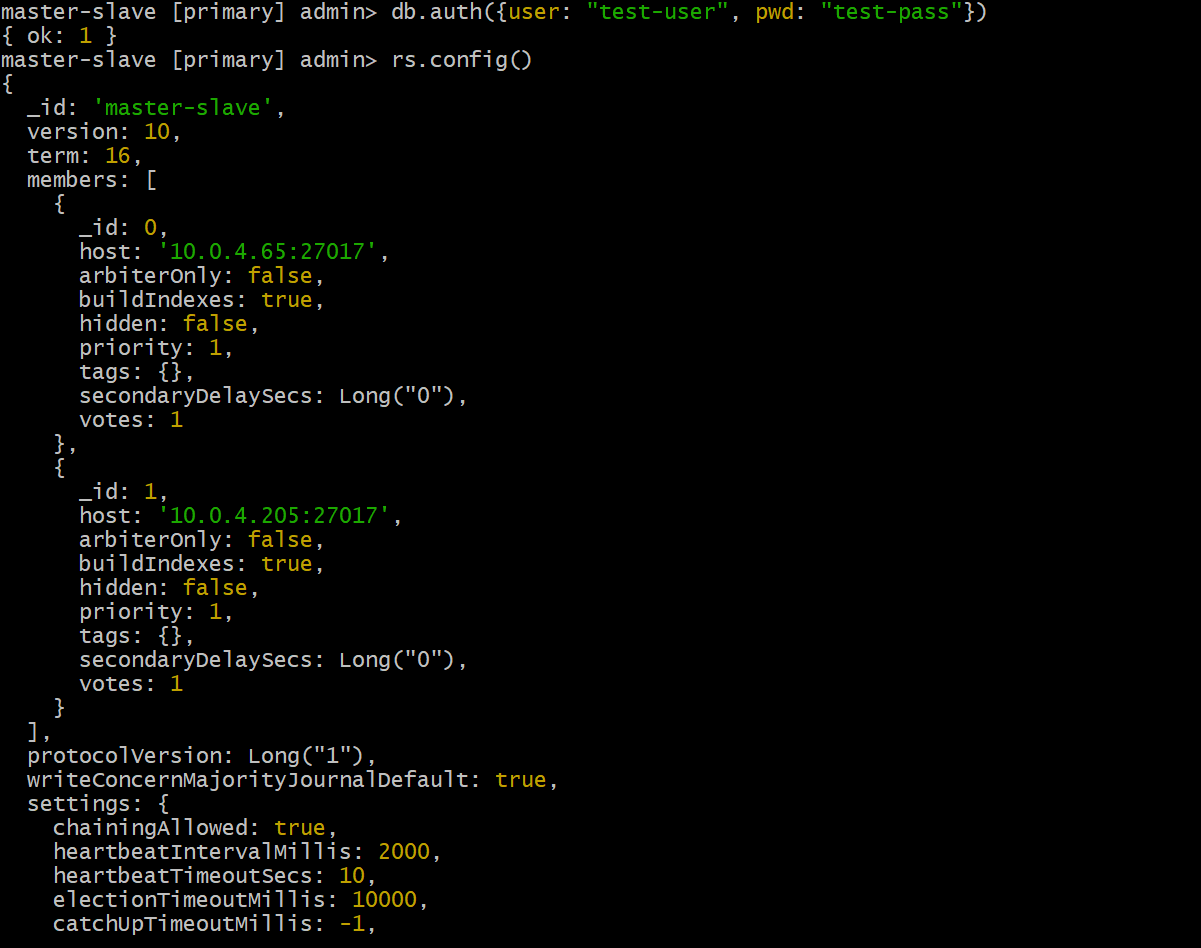
rs.config()
TODO - implement rs.stepDown()
Additional MongoDB resources -
- https://www.mongodb.com/basics
- https://www.mongodb.com/docs/manual/
- https://www.mongodb.com/databases/scaling
- https://www.parkplacetechnologies.com/blog/storage-performance-metrics/
Very important mongodb cluster
https://medium.com/swlh/mongodb-creating-a-3-node-replica-set-cluster-7ca94849b139